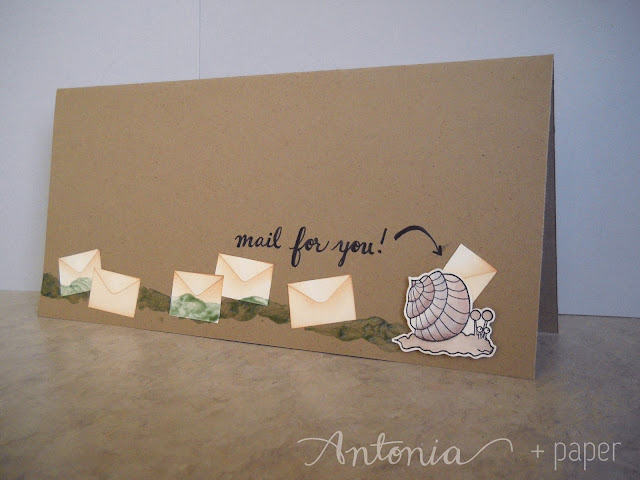
Today's card started off with the main embellishment. I have to listen to a lot of radio shows for a class I'm in, and I feel bad if I'm not doing something. So to keep my hands busy, I've started coloring in stamped images. I colored the snail probably about two weeks before I figured out exactly what I wanted to do with it!
So here's the card! I started out with a regular sized card (4 1/4" x 5 1/2") but then realized the vision I had for this card is far bigger! So I did some quick internet searching of what the size is for a standard business envelope (4 1/8" x 9 1/2"). I subtracted a quarter of an inch off of the dimensions to get a card that would slide in and out of the envelope easily at 3 7/8" x 9 1/4".
Speaking of envelopes, I thought it would be a super cute card if the snail looked like it was delivering envelopes! So I cut out all of these envelopes by hand, and inked them with my Inkssentials Ink Blending Tool to make the envelope flap stand out. And I glued them all onto the card! I stuck the snail on with some Foam Adhesive.
Then I thought, what about a snail trail? Wouldn't that be the coolest thing? But how to make it shiny? Luckily I have some chalk pastels and glossy Mod Podge hanging around! I picked a light green and a brown chalk and created some muddy brown dust by scribbling it in a concentrated area. (This is the set I used. I used the green and the dark brown that are in the first column in the picture.) Then I used a brush (I have a set similar to this one) to mix the dust into a quarter-sized dollop of glossy Mod Podge. (It has to be the glossy kind--not matte!) After doing some tests to make sure it worked, I used a brush to create an uneven snail trail across the card.
Doesn't that slime look awesome?!
Here's a close-up of the snail! I colored it using Bienfang Watercolor Brush with the clear and the brown brush in the set. I also used some purple from the Colorbox Fluid Chalk Ink in Wisteria to add an accent shadow on the shell. I think I used the lightest brown from the Martha Stewart Watercolor Markers to shade in the body of the snail. All of the ink were applied with the water-only brush from the Bienfang set from a reservoir I created by scribbling or stamping on my Kraft Mat. This keeps the colors from getting too intense and lets me have more control.
Then I thought it was a little boring, so I decided to add in a sentiment. I thought not actually saying "snail mail" would be kind of fun, making it something for the receiver of the card to puzzle out. So I just wrote "mail for you!" with my Pilot BeGreen Precise V5 black pen.
And that's the entire card!
BASIC INSTRUCTIONS
1. Color the snail. Cut it out.
2. Create 7 envelopes by cutting out small rectangles, and small rectangles with a curved point. Accent by adding the shadow with the Inkssentials Ink Blending Tool and Distress Ink in Tea Dye. Glue the pieces together with a liquid glue.
2. Adhere the envelopes with an adhesive runner.
3. Add the snail on with a foam tape.
4. Mix colored chalk dust with glossy Mod Podge. Apply with a brush.
5. Write in the sentiment.
MATERIALS
Adhesives:
Stamp:
Coloring Tools:
Embellishment:
Tools:
Brushes (something like this)
Paper:
Standard Tools:
Bone Folder-- something like this one


No comments:
Post a Comment